ON THIS WIKI
Labyrinth
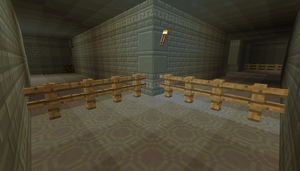
The Labyrinth is a two-level maze that contains a Minoshroom at the bottom and many Minotaurs. It also has a considerable quantity of loot but is difficult to traverse due to its labyrinthine nature. The Labyrinth is made of Mazestone, a nearly unbreakable block that is often sandwiching Bedrock, preventing the player from simply digging through the walls to reach the next level. Each level of a Labyrinth can be mapped using a Maze Map which will be centered at the X, Y and Z coordinates that the player chooses; unlike other maps, a Maze Map is height-specific. The Maze Map will not function if there is no nearby Labyrinth. Labyrinths show up on a Magic Map as a grey and black square, a palette swap of the icon for the Hedge Maze.
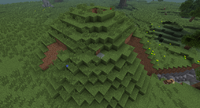
In earlier versions of the Twilight Forest Mod (those present in Beta Pack A, for example) the Labyrinth's entrance generates out in the open. Later versions (Mindcrack Pack, Direwolf20 Pack, and so forth) keep the same basic entrance generation, but the Labyrinth is covered with a hill that has a skylight leading from the surface to the Labyrinth itself and an entrance on all four cardinal directions. Gravel can also be present on the Labyrinth entryway floor.
Contents
Labyrinth Layout[edit]
| Spoiler warning! This article contains detailed information of discoveries, recipes, or secrets, which are intended to be discovered through in-game mechanics. |
The first floor is accessible from a small ruin entrance in the clearing made out of Stone Brick and Mazestone. Caves may also go through the labyrinth, making it accessible in that manner. The first floor contains a small quantity of loot, many twisty corridors, and a single entryway into the second floor.
The second floor of the labyrinth is always surrounded by bedrock and must be entered via the first-floor entrance. In newer versions (later than Beta Pack A) beetles and Maze Slimes spawn. In all versions, vanilla mobs (including Cave Spiders) as well as other Twilight Forest specific spiders and Minotaurs will spawn. The second floor does contain some light sources, but not very many and certainly not enough for a player to navigate properly.
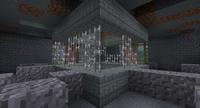
The second floor introduces treasure chests which are behind Iron Bar cages with torches above them. These Iron Bar cages sometimes contain Tripwire that will activate TNT below the floor upon attempting to access the treasure too hastily. These chests can contain a variety of low value treasure, such as Steeleaf, leather, torches and torch materials, and food.
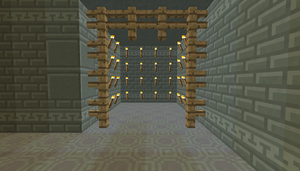
The second floor also introduces treasure rooms that contain a Minotaur spawner in the center behind more iron bars. Each treasure room has four pillars made of Mazestone and Iron Bars. One pillar will hold a spawner, two will have chests, and the last will have a TNT trap. These chests contain medium level loot, such as Iron, Steeleaf, Ironwood Ingots, and Ironwood/Steeleaf Armor, as well as the occasional Maze Map Focus for mapping more Labyrinth levels.
The Secret Room[edit]
Oftentimes, the second floor of a maze will contain a secret room that contains very potent treasures such as a Mazebreaker, Emerald Blocks and Emeralds, one or two Ender Chests, some Steeleaf, some Ironwood Ingots, many buckets of milk, and sometimes heavily enchanted armor and weapons can also spawn. The secret room will usually (but not always) contain at least one Mazebreaker so that one can escape from the maze more easily.
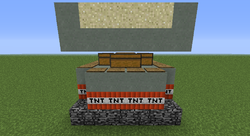
To easily find the secret room, craft a Maze Map and explore the entire second floor. At some point, you should see one small section of the maze (Usually up against one border of the maze) which looks like it's filled in completely solid with Maze Blocks. In the center of that seemingly solid block of Mazestone is the Secret Room, behind approx. five layers of Mazestone. Dig your way through to see four double chests in the center surrounded by 16 wooden pressure plates which are resting on TNT. Be extremely cautious, as the pressure plates WILL be activated by items falling onto them.
Sand is above the ceiling of the secret room, preventing easy entrance from the top. Entrance from the bottom is also difficult due to the bedrock floor. Great care should be taken when entering so you don't set off the TNT.
One tactic to succesfully looting the Secret Room is, once you have an idea as to where it is, tunnel into the room one block lower than the standard level (so that you are standing on the Bedrock layer under the maze, not the Mazestone layer that makes up the floor in the Labyrinth. This will help prevent mined blocks dropping onto the pressure plates, and allow you to 'defuse' the TNT blocks by harvesting them first.
Exploration Tactics[edit]
Navigating the Labyrinth is a rather difficult task indeed, especially the first time. The difference between life and lost loot is a plan. Here is a suggestive list that might help if implemented properly.
- Always have a 'Field Base' set up within your entrance to a Labyrinth. These Field Bases consist of two or more large chests, and a workbench; Remember to wall these off and make them brightly lit. A dead end corridor is best. Make sure to use your Minimap markers or develop some way to track your exit's general direction.
- Labyrinths become stocked easily with materials to keep you supplied through your spelunking adventure. The Corridors will consistently spawn rooms filled with torches, perfect to top off your stack. The Minotaurs will drop Meef Stroganoff and one can find Maze Wafers hidden around in chests.
- When going in, one might find a stack of fences essential to keep the hostile mobs from swarming. The corridors of the maze are perfectly narrow to quickly establish walls while being wide enough to give plenty of breathing room.
- A bucket of water is always handy, either when climbing down the second level or preventing death by fire.
- ON SMP One should attempt to bring a friend or two along while touring the Labyrinth. Having a seperate player tasked with making fence walls can make exploring fast and easy, but only if working together.
- Remember, even without the Mazebreaker, Mazestone is still breakable and harvest-able, if in an absolute pinch you can tunnel your way around. Just be careful, something nasty might be on the other side.
Labyrinth Loot[edit]
Tripwire Chests[edit]
Loot is similar for both trapped and normal chests behind double iron bars. Seven items chosen at random from the possibilities below will be in the double chest.
| Consumables | Bucket of Milk, 1-12 Maze Wafers, 1 Golden Apple, Mushroom Stew, 1-12 Arrows, 1-12 Sticks, 1-2 Feather |
| Materials | 1-8 Steeleaf, 1-4 Leather, 1-2 Flint, 1-2 Blaze Rod, 1-12 Paper, 1-13 Coal, 1-4 Iron Ingots, 1-8 Ironwood Ingots |
| Plants | 1 Cactus, 1-2 Wheat Seeds, 1-2 Sugar Cane, 1 Flower Pot, 1-4 Rose, 1-4 Flower |
| Special | 1 Charm of Keeping I, 1-5 Fireflies |
Boss Room & Minotaur Spawner Rooms[edit]
The Boss Room on the bottom floor and the Minotaur spawner rooms have identical loot options; four single chests in the boss room, two in each spawner room. Each chest will be stocked with seven items chosen at random from the possibilities below.
| Consumables | Bucket of Milk, 1-12 Maze Wafers, Potion of Health II |
| Materials | 1-4 Iron Ingots, 1-4 Ironwood Ingots, 1-4 TNT, 1-4 Gunpowder, 1-6 Steeleaf |
| Tools | Steeleaf Pickaxe |
| Armor | Steeleaf Boots, Steeleaf Plate, Steeleaf Helm, Steeleaf Legs, Ironwood Plate |
| Weapons | Ironwood Sword |
| Special | 1 Charm of Keeping I, 1 Maze Map Focus, 1-5 Fireflies |
Secret Room[edit]
The loot in the secret room is the most difficult to extract safely. The effort is well rewarded, with each of the four double chests holding seven items chosen at random from the possibilities below.
| Consumables | Potion of Regeneration II, Potion of Speed II, Potion of Health II, 1-12 Maze Wafers |
| Materials | 1-9 Iron Ingots, 1-9 Ironwood Ingots, 1-12 Steeleaf, 1-5 Emeralds, 1 Emerald Block |
| Tools | Steeleaf Axe (Efficiency V), Steeleaf Pickaxe ( Efficiency IV, Silk Touch I), Steeleaf Shovel (Efficiency IV, Unbreaking II) |
| Armor | Steeleaf Boots (Protection II), Steeleaf Helm (Respiration III), Steeleaf Plate (Protection III), Steeleaf Legs (Fire Protection IV) |
| Weapons | Bow (Punch II, Infinity I), Bow (Power III, Flame I), Steeleaf Sword (Sharpness IV, Knockback II), Steeleaf Sword (Bane of Arthropods V, Fire Aspect II) |
| Special | Charm of Keeping I, Ender Chest, Mazebreaker |
| ||||||||||||||||||||||||||||||||||||||||||||||||||||||||||||||||||||||||||||||||||||||||


 Discussion

